Week 11
- Tessa Wishart
- Oct 12, 2021
- 5 min read
Updated: Oct 13, 2021
5th-11th October
Level 3 Lockdown - Still working from home
Sorry I'm still working on uploading images to this post!! I'd most like feedback on the slip dress down the bottom of the page
Things I did this week:
Finished final zero waste skirt toile
Finished zero waste skirt final fabric (excluding metalwork details)
Developed zero waste slip dress pattern
Finished slip dress first toile
Finished slip dress final toile
Picked up chemicals and materials for printing processes
Considered further compromises for time allowances
Primary - Zero Waste Fan Laced Skirt
Toile Developments
Firstly I added the ruffle onto the bottom of the calico toile to see if I liked the effect. Although I knew the silk would be more lightweight and have a great effect for a ruffle, I ended up deciding against using it in my final garment.

Final Skirt Toile
This was a hugely time consuming part of my week. I chose to sew the final toile in two colours, so mostly worked in ivory silk but ended up cutting one pattern length (four main panels and matching wedge shapes) in red viscose silk, which I'll be upcycling into the red statement bra. I also sewed the lacing strips in the same red, as these laces will be upcycled directly into the bra.
I chose this because this was a far better zero waste option to add the red fabric into a toile rather than as a half of the slip dress, as that pattern is integrated so it wouldn't be zero waste to split the colours.
I also chose to sew the final toile entirely in french seams - this was important to me as I was choosing how the dispersal of fullness and the wedge shapes would play out, so I needed to know how the seams would look and sit, if they'd be too bulky... working up to this level of detail certainly helped me to know the best construction detail and order so as to sew the final skirt in the best way.

Fan Lacing
I ended up following this tutorial and lacing the skirt in the new way as directed - as the lacing pattern I was trying to emulate from my vintage laced corset onto the previous laced skirt toile simply wasn't functional and didn't help with cinching and sizing the garment at all as it didn't open and close smoothly. The new method in this tutorial works excellently and actually helps to make the corset lacing much smoother and more highly functional.

Final Skirt
Whilst I had the momentum of this pattern, and have been awaiting some last materials to start printing processes, I decided to start straight in on making the final skirt. (Without the metalwork pieces yet.) This is sewn entirely in french seams, and I've used buttonholes in the waist sides and as eyelet holes for the lacing in back.
I've chosen this over traditional metal eyelets as I feel that in a sustainability sense I can't justify the hardware. As I'm using silk with cotton thread, the garment would be entirely biodegradable without metal eyelets and the metal lacing buckles - but these buckles are removable and reusable so far more functional/justifiable. I'm also sure that the weight of metal eyelets in the silk is far too heavy.
Overall, all that I need to add to this piece is the final metal buckles and then move the laces into a fan lacing formation, and then add in any branding which I come to design - either a personalised silk scrap biography sewn into the garment somehow, or perhaps a tag or a metalwork detail of some kind. (Or the embroidery mark I've been considering stitching.)

Slip Dress
Small Scale Pattern Considerations
I continued to consider other ways to put the pattern together - I was unsure of whether or not I liked the half scale option I'd produced, and it was largely too long as compared to scale. I made several more paper copies, but couldn't get far enough so as to find a better option to make the slip dress cut on the bias and zero waste.
(SHOW MINI MANNEQUIN)


Slip Dress First Full Scale Toile

Rotatable Slip Dress Final Toile

Working with this silk has proved it has very high static, and is prone to fraying as well as puncturing if not sewn with the sharpest thin needle. Working through the seams was invaluable - I was most unsure about the bottom panel joins, but discovered my domestic machine has an overcast stitch setting which is very friendly to lightweight fabrics. Other than the attachment of those hemline panels being overlocked, I intend to sew in french seams - including the side seams, as the one with the slit will need facing down the slip area.
As I'm happy with the fit, my next steps for this piece are designing the print pattern! Then sewing the final garment front and back pieces and printing on them.

Fits: Front, Side, Back.

Rotations: This shows the front of the silk dress rotated in all four positions - note that the long vertical seam will be the colour change, and the second two images show the sides which will be in block colour. The slit up the side of the colour change can be worn in either the front or the back.

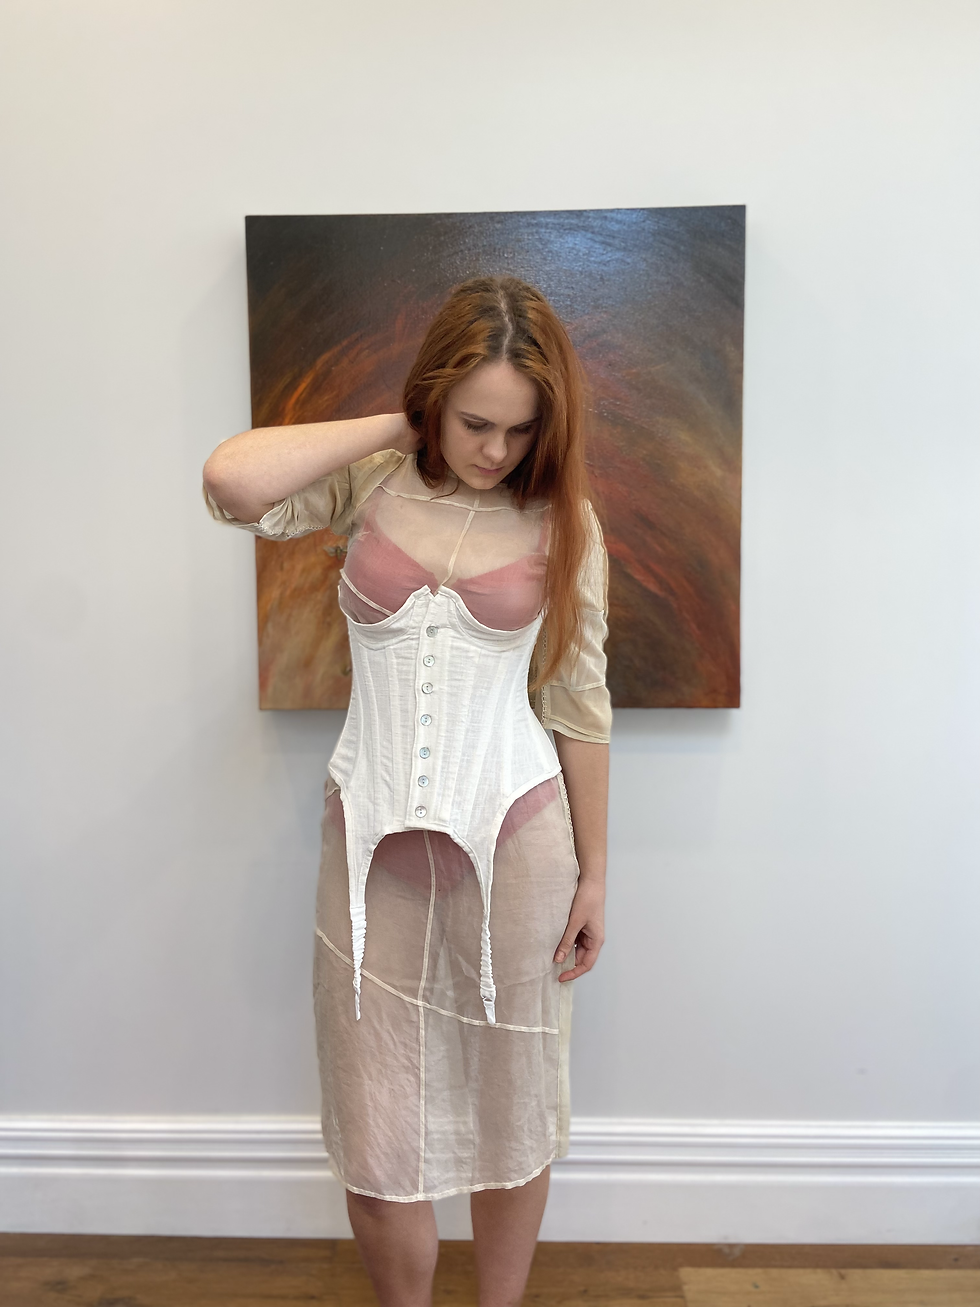
Fitted with Final Corset Toile
Note - Corset fit and the way it gapes at the front is something I'm very aware of and will have fixed in the pattern before I make the final garment.

Photoshopped colour values - note the dress and straps have been rotated to show the colour range from a side perspective.

Fitted with both corset and denim jacket (does show that pairing with two garments is too many). But I'm happy with the proportion of the height of the jacket hem to the length of the dress.


Upcycling Map
Next, once I figure out further details I may make a digital copy of the pattern map and the upcycling which will directly occur to the final toile materials/garment. This may match the denim jacket/corset map pattern. I've figured out the size of the corset print, as this will be directly upcycled from the silk final slip dress toile.
Considerations and Compromises
I'm considering cutting the collection down further to only to outfits - understandable given that making the lingerie too is quite a bit of work. As below, I'm considering cutting out the statement dress. I would/could still make the sleeves, as these would attach to the slip dress beautifully and look fantastic - and I need to make a primary toile in the red gauze still so that I can make that statement lingerie set.
Alternatively, if I do find the time to make the dress I may wish to develop and convert my now existing slip dress pattern, adding godets for fullness in the waist to hem areas.


Comments