Week 9
- Tessa Wishart
- Sep 27, 2021
- 6 min read
21st-27th Sept
Level 3 Lockdown
Updated Formative
My feedback from last week was that the quantity of work that I'm wanting to take on at this level is still too great in relativity to the reality that we'll be working from home realistically throughout the entirety of the end of the semester.
Reducing the collection depends of the ability to balance the garments so that I can still feasibly create the primary toiles in the right fabrics to be upcycled into secondary undergarments.
I've found that if I cut out the black ruched lingerie bra and panty set, and take out the plain cream dress, the collection can be restyled into just three looks that are quite multifunctional and have pieces that style together in different formats quite easily/well.
I also quite like that the colour tones were reduced slightly: I think they'll respond quite well together and style well.
Pieces:
Primary:
x2 Dresses
x1 Removable Sleeves
x1 Skirt
x1 Denim Jacket
Secondary:
x2 Lingerie Sets
x1 Set Gloves
x1 Denim Underbust Corset
Total Pieces: 12
Further reduction as required:
The first pieces which I'd take out/reduce in the collection if I really needed to would be the silk skirt and the red garter belt and gloves: I may choose to make these last for this reason. If I have extra time (unlikely) instead of considering adding back the extra pieces already reduced I'll simply focus on other areas of work.

Colour work: hints of colour will also be screen printed or hand painted into some of the significant printwork pieces: the printed dress in particular.
Making/Upcycling fabrics map:

I've intentions to continue to follow the same timetable made last week:

I would edit this slightly: I want to aim to get ALL patterns done this week, and ALL final toiles done next week, so that week 11 can be printwork designing, and week 11-13 being printing and final garments sewing.
Corset Toiles and Fitting
Having made a first toile from the Edwardian shaped corset pattern, I began to adapt many of the seams by drawing on, and significantly altered the hem into the shape I wanted, and drafted in the underbust cups.
I added notched then cut one side of the corset, to redraw each pattern piece to the new shape. I drafted in 1.5 of extra seam on the outside edge of each piece to allow for a flat felled seam approach of making boning casing, on top of regular seam allowance. This makes the corset possible to be fully enclosed without need for overlocking, to be more sturdy and historically accurate.
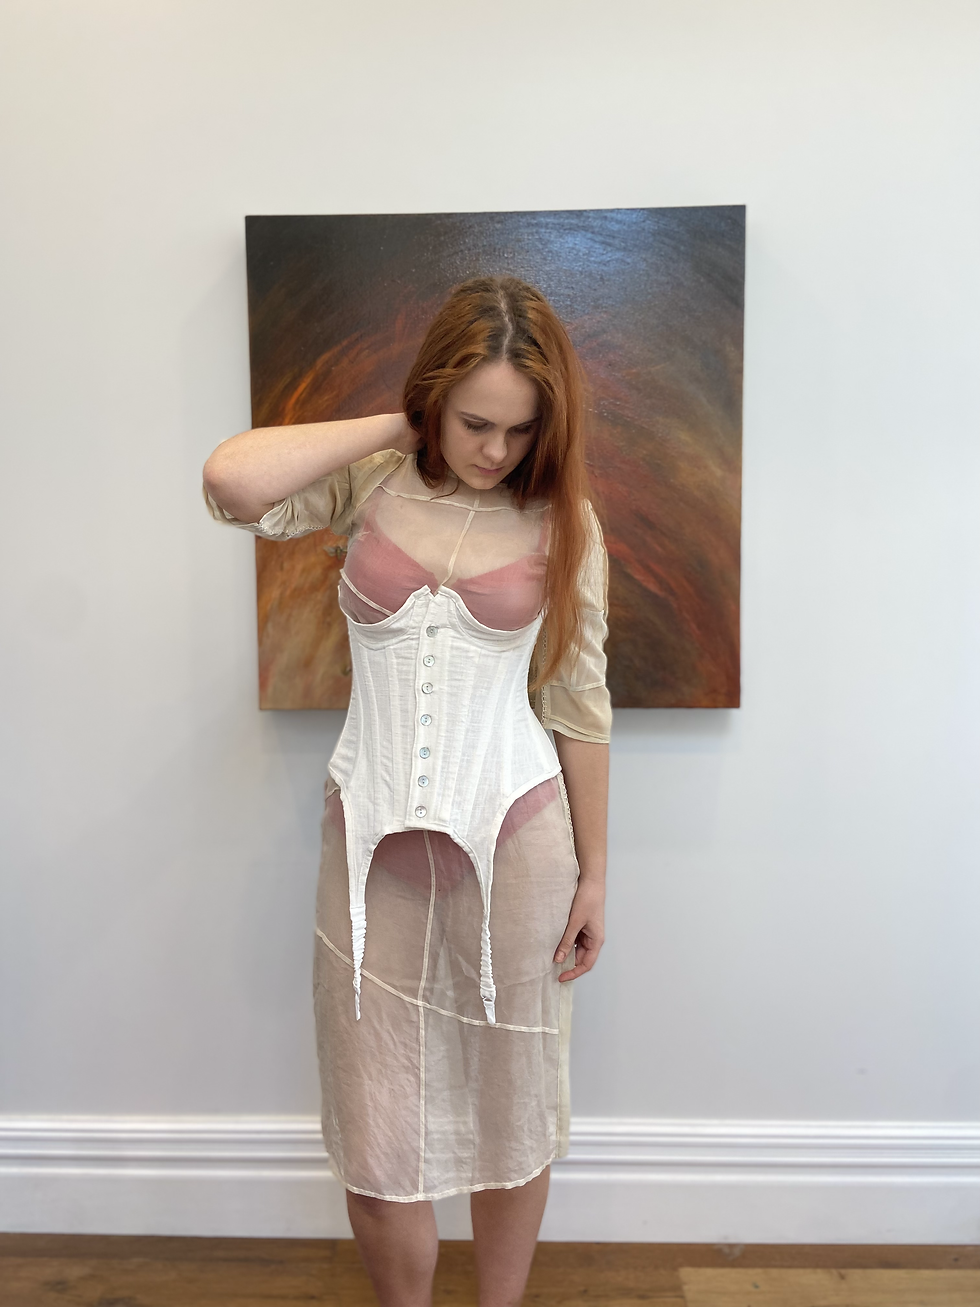
I made a second toile in white linen, sewing as close to final as possible so that I can wear this piece later. The front buttons are mother of pearl: placket designed to mimic the one I'll be upcycling from denim jacket toile and lining with boning. I bound the top and bottom with FOE binding.


Note that I'm wearing this unboned. I just LOVE the styling of this piece in the red underwear as a contrast (Videris underwear, not my own work). I'm styling this piece on top of a silk dress for the collection, but I'll likely also photograph wearing the undergarments separately so will style this with the blue cyanotype lingerie set. As below, I tried styling with my toile of the statement bra set - but to be honest the same quarter bra cup shape doesn't work as well layered on top of each other like that.

I've mostly been happy with the fit of the corset - the first fittings I did were without the boning inserted as I only had enough at home to use in the final so wanted to save it for that. So the slight slouch/wrinkles were to be expected without the boning support. I drafted the pattern to use this boning I had: a 12mm wide white plastic rigilene boning.
I did notice that the pattern sits slightly too low: I intend to raise the top by about 2cm by slashing though the waistline of the pattern and raising upwards. Hopefully this will help the cups sit upwards against the underbust better. I also want to alter the shape of the curve in the bottom hem slightly to sit outwards slightly: I'll play around with these pattern pieces slightly - should still be so that the boning/seam doesn't go through the middle of the garter hem shape, but this shouldn't require a whole new toile)
I've also decided that I think I want the back of this piece to have fan lacing! I wan't going to seeing as it had been intended to be styled under the skirt, but now that the collection reduced and styling was changed I think it'll be a really good cohesive feature and the more detail the better!! If I don't get the chance to etch any metal for buckles I do have some conventional steel fan lacing buckles already.
I eventually some stainless steel boning and steel end caps to bone the corset: this is a much more historically accurate option and rigilene isn't really up to the support level which I need wouldn't match the denim very well. This also works since I'm trying to stay away from plastics within the collection and only stick to metal hardware whilst considering garment lifecycle and end of life: hardware like this can be repurposed much more easily.
I've ordered 7mm spiral steel boning and end caps; and 10mm flat steel boning. Spiral boning has a bit of sideways flex, so isn't suitable for use in the centre front and back of corsets where the closures need the extra support, but is very recommended for any other seams, which is why I'm getting both types.
I also ordered cotton lacing tape (7mm) - I just have to hope it fits in my fan lacing buckle holes and eyelet holes; but I think this is more technically correct and suitable than handmade binding for lacing, and I can justify it given that cutting lengths of trim like this doesn't make any waste.
TO ALTER IN PATTERN:
Shave 5mm off the sides of each pattern piece since my final binding (spiral steel 7mm and flat steel CF&CB 10mm) is thinner than the 12mm plastic boning I first thought to use.
Can cut out the notch in the top centre front and make the seam straight.
Slash the centre of each pattern piece and raise by 2cm.
Alter the shape of the front curve (and raise at the bottom centre front???) Shape still looks awkward.
Add .5mm extra room in the top edge of bra cups so that underwire has a bit of extra room.
Put more room in the fold over of the back so that the eyelets have two layers and strip of support boning on each side.
Draft in garter hooks and loops to fit the removable hooks (and covered elastic straps extending to them) - I have deadstock white hooks already to use.
Adapt for fan lacing!! Draft in strips for buckles.
Once finished the pattern, move to denim jacket and see how well all pieces fit. Possibly and likely, I may have to lengthen the jacket (pattern makes this very doable) to fit in the front button placket pattern piece if I don't want an intersecting seam. - Although!! it would be covered by the printed silk applique so would be doable...
Design pattern for silk applique on front. Or could just use scraps of the slip dress pattern depending on time.
Design fan lacing buckles
And... Hope and pray that my domestic sewing machine and denim needles can withstand the thick thread and fabric!!! I'm planning on going straight to making the final garment next as these alterations aren't structurally significant, but I may have to wait a few weeks to see if I can get studio access to industrial machines to sew it and the denim jacket. I'll see how I go with sewing the jacket toile in cream denim on the machine first.
Beginning Slip Dress Zero Waste Pattern
Starting to pattern make this piece - the dress must be quite simplistic but still be zero waste. My inspiration is a simple bias cut v-neck slip dress - the challenge is achieving the look of bias cut silk without the fabric waste.
The pattern must also be entirely symmetrical - the dress will be two toned in two different colours, as I intend to cyanotype and van dyke print some high impact artwork designs on each side. The symmetry is required as the straps will be tied thin straps - so the dress can be untied and rotated on the body for one colour to be in front and one in back.
Below is my most simple option - I'm working with a very thin fabric (110) so this makes for a very slim and shapeless dress. (Although I do intend to style it with a corset) - this is the option I'll take if the other ideas are too time consuming or don't work right.


Other options - I began to examine Julianne Bramson's 'Magic Slip Dress Pattern' which uses rotated squares to achieve the bias (although not zero waste. Although I'd have to intersect some of the squares to split the colours, I worked through a way to achieve this with no waste at the scale ratio to match my fabric width. I modelled this in paper and then moved to a half scale pattern draft.


Some notes for theory...
I particularly like crochet as it can only be done by hand, and can't be machine replicated. Although I'm applying the technique in a lace-like context, I think the nature of the handcraft really lends itself to the natural, considered artisanal collection I'm developing.
Talking of lacework crochet details...


Comments